

Heavy clay soil can frustrate even the most optimistic gardener. Follow this 6-step plan to improve soil structure and drainage so you can garden with ease and grow crops that thrive.

This page may contain affiliate links. Please read my disclosure for more info.
The compacted, hardpan dirt in my first yard was a despicable pass for soil.
The builders scraped off the topsoil when they built the home in 1955, and after the clay subsoil was nice and compacted by construction machinery, they placed sod right on top of it.
During a rain, water hit the hardpan clay soil like pavement and quickly sheeted away, unable to soak in and irrigate the lawn or hydrate the soil organisms below.
In the backyard, previous homeowners filled in the swimming pool with low-quality, heavy clay construction fill. Not only did I find blue-painted chunks of concrete when I tried to dig, the thought of trying to put a shovel into the clay sent shivers down my spine!
I wasn’t sure how to create a healthy, productive garden without back-breaking labor to improve my situation. It seemed hopeless.
I added organic matter in large amounts, but the clay soil just seemed to swallow it up without showing any signs of improvement.
I figured there had to be a better way, so I started researching how to transform my hardpan dirt into rich, loamy-clay soil the way nature might do it. My research led me to a combination of steps that totally worked, and I’m excited to share them.
They’ll have you feeling optimistic about your garden again! But first, let’s look at what’s good and not so good about clay soil.
In this article:
- The good and the bad of clay soil
- Contouring the land to improve drainage in clay soil
- Aerating clay soil to improve drainage in clay soil
- Adding soil amendments to improve the structure of clay soil
- Planting a cover crop to improve the structure of clay soil
- Mulching appropriately to protect clay-dominated garden soil
- Avoiding walking in the beds to maintain healthy, clay-dominate garden soil
- 5 FAQs about improving clay soil
The Good and the Bad of Clay Soil
Of all the different soil types (sand, clay, silt), clay soil is made up of the smallest and densest particles. These small and dense particles can cause drainage problems and become compacted easily. However, clay can also hold onto nutrients.
So, all is not lost, we just need to manage it properly!
Let’s look at how to transform that solid, waterlogged soil into a rich, loamy clay that is just right for planting.

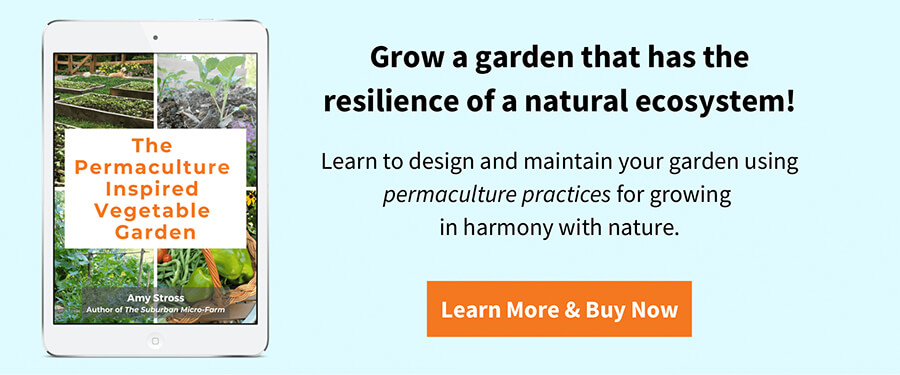
Would you like to yield delicious harvests while partnering with nature? Check out my mini guide, The Permaculture Inspired Vegetable Garden.
Correcting Clay Soil Problems
Following are a number of things you can do to make your clay soil amazing. The more of these steps you can take, the more amazing your soil — and garden crops — will be.
1: Contour the Land
Add contours to your garden terrain by creating a gentle undulation of alternating high peaks and low valleys. Contours of raised planting berms, terraces, raised beds, or even permaculture swales help slow and manage water.
As water undulates and slowly filters through high and low points on the land, it is oxygenated, which reduces waterlogging. Organic matter naturally builds up in low spots where water collects, while high spots provide planting areas that dry out faster.
If you plan to build raised beds, follow steps two and three below before constructing the beds so that you have a well-drained foundation. Are raised beds right for you?
Contour the land before all other steps. The ideal time to build contours is when the soil is moist but not waterlogged. Working clay soil when it’s soggy can make matters worse.
In summary, gardens with heavy clay soil can become compacted very easily, so it’s essential to think about contours (peaks and valleys) to combat gravity and drainage problems.
2: Aerate Clay Soil
Injecting air pockets into clay soil is essential for improving drainage, breaking up compaction, and inviting in soil microorganisms. When clay soil isn’t prepared properly, a solid sheet of clay can be found underneath a layer of loosened/amended soil.
Here are three tools that I love to use for this work:
- Broadfork
- Digging fork
- Plug coring aerator
>>> Browse my favorite tools for the job in my Improving Clay Soil Amazon Shop.
Use your tool of choice to aerate garden soil twice a year — in the fall as the season ends, and in the spring before planting. Fall aeration is especially important because it counters any acts of gravity/compaction that occurred throughout the season.
To use these tools, simply start at one end of the garden and work backwards (so you don’t step on loosened soil) poking holes throughout as deep as you can.
Or let clay-busting plants do the work for you. 🙂
A Note on Tilling: Are you wondering about tilling to improve clay soil? In many cases, tilling can contribute to more compaction.
However, as long as the soil is moist (but not waterlogged), a one-time tilling can be a decent aerator, after which, the other suggestions in this section will likely produce better long-term results (less compaction, lighter and richer soil, fewer weeds).
Tilling operates a little differently than the other aerating methods I’ve mentioned, but it’s important to add organic matter at the same time to get the best results.
Learn more about transitioning to a no-till garden.
Aerating doesn’t improve much if you don’t follow it up with adding compost or other bulky soil amendments. If you aerate by itself, you’re just exposing the clay to more of the elements that hardened it into solid mass.
Continue to step #3 for suggestions on adding organic matter.

The digging fork pulls double duty as I add homemade compost to an aerated garden bed.
3: Add Soil Amendments to Clay Soil
Add soil amendments immediately following aeration so that the rain can wash them into the holes and soften the clay. You’ll need lots of organic matter at first to really change the structure of the soil.
The following types of organic matter attract microorganisms that speed up soil improvement by developing tunnels (more aeration) and pooping a lot (more organic matter to break up the tightly wound clay particles).
Some Amendments to Consider for Clay Soil
Compost:
Homemade compost is an excellent soil conditioner that improves drainage. Learn how to build a compost bin that’s right for you.
Unfortunately, herbicides can contaminate both home compost bins as well as store-bought compost. Learn how to source herbicide-free compost.
Green Manure:
Cut green plant matter from other areas of the garden and spread it evenly over the soil for a nutrient-rich amendment. (I like to use herbs of all kinds, but comfrey is a favorite.) Herbal compost teas can also be used.
Leaf Mold:
“Pound for pound, the leaves of most trees contain twice as many minerals as manure.” Fall leaves are both a valuable mulch and soil builder.
Shredded leaves tend to break down faster from mulch to rich soil, increasing soil health. They also allow rainwater and air to better reach the soil. Non-shredded leaves tend to form an almost impenetrable mat for a time until they start to compost down.
Leaves that have decomposed for a year or two are considered to be leaf mold, a rich and crumbly “black gold” for garden soil.
Livestock Manures:
All kinds of garden-approved, composted manures are excellent soil conditioners. The only modern challenge is the potential for it to be contaminated with herbicide. Learn more about herbicide contamination in manure.
A Note on Manure Application Etiquette: Do not spread manure on frozen or waterlogged soil, or before a heavy rain. This will help to keep your local waterways clean and ensure valuable nutrients don’t wash away.
Worm Castings:
This is one of my favorite homemade sources of organic matter, which is high in minerals, nitrogen, and humus. Learn how to make your own worm castings in this article about building a worm bin. Check out these worm bin problems for beginners before getting started!
>>> Browse my favorite soil amendments in my Improving Clay Soil Amazon Shop.

Leaves composting into leaf mold, a rich garden amendment.
Once you’ve dispensed soil amendments evenly over aerated garden beds and allowed a rain to wash it in, what’s next? You’ll either plant a cover crop (if it’s the right time of year) or mulch appropriately, which I discuss in the next steps.
4: Plant a Cover Crop
Cover crops help incorporate soil amendments deeper into clay soil by rooting thickly and downward. They reduce erosion and enrich soil. You can plant either fall or summer cover crops.
There are a lot of cover crops to choose from, and which is right for you will depend on your climate. Cold winter temperatures kill some cover crops so you can plant in the spring without a lot of prep work. Other cover crops require tilling or cutting before planting crops.
Your local extension office will be a huge (free!) help in selecting a cover crop that is appropriate for your climate/soil/region and gardening style.
The Rodale Institute discusses cover crop options for the no-till garden, and Anna Hess covers the topic thoroughly in her book, Homegrown Humus: Cover Crops in a No-till Garden.
Plant fall cover crops in late summer or early fall. They’ll provide overwintering habitat for beneficial insects.
Plant summer cover crops in late spring. They’ll fill empty spaces in the garden and provide flowers for pollinators.
>>> Browse my favorite cover crops in my Improving Clay Soil Amazon Shop.
Chop cover crops back (I use a weedeater) about three weeks before planting, if they haven’t died back on their own. A few days after cutting, use one of the aerating tools mentioned above to poke holes into the root mass to incorporate some of the plant matter as well.
Plant directly into the plant matter.

This garden bed is mulched with shredded leaves.
5: Mulch Appropriately
Once you’ve aerated and added soil amendments, add mulch if you won’t be sowing a cover crop. Bare soil is a recipe for compaction. Shredded leaves are my favorite mulch. I get to recycle free matter that I find in my own yard! Leaves feed the soil quite well.
Straw used to be a very appropriate and age-old mulch material, but it’s possible that modern straw is contaminated by herbicide. Always know your farmer, always ask.
During rainy periods, mulch lightly so that the soil can breathe and won’t become susceptible to fungal issues. Mulch heavily in dry and hot conditions to protect soil. Learn 5 ways to mulch in the permaculture garden.
6: Avoid Walking in the Beds
After all the work you’ve done to improve your clay soil, the last thing you should do is walk in the garden bed and cause compaction all over again.
Garden soil is very expensive when you think about all of the time you’ve taken to improve it, purchase soil amendments, and collect and disperse organic material.
Create garden beds narrow enough that you don’t have to walk in them to manage all sides.
When I started gardening, 4-foot-wide beds were a great size for making the best use of space in my small garden. But I quickly learned how frustrating it was to not be able to reach all areas easily. I’ve settled on three feet wide as my favorite bed size for my personal reach.
Whichever size bed you decide on, be sure you don’t have to step on your rich, pampered soil.
As you can see, even though heavy clay soil can be frustrating, there are a lot of ways to improve it so you can garden with ease and grow crops that thrive.
However, improving clay soil is a process. To achieve rich, loamy garden soil, you may need to repeat these steps as an annual practice. Through consistency, you’ll discover which steps are the most effective for your situation.
5 FAQs about Improving Clay Soil
#1: What is good and bad about clay oil?
Clay soil is made up of the smallest and densest particles. This density can lead to drainage issues and compaction, but it also enables clay to retain nutrients effectively.
#2: What can I do to improve clay soil?
Improving soil structure and drainage is a gradual process that requires time and patience. There are several effective steps you can take: contour the land, aerate clay soil, add soil amendments, plant a cover crop, mulch appropriately, and avoid walking in the beds. The more of these steps you implement, the better your soil quality will become over time.
#3: I want to start a no-till vegetable garden in my front yard. Is there anything I can do to improve the soil and grow vegetables right away?
You can top the lawn with cardboard, which smothers the lawn over the course of a year. First, you’ll want to aerate the lawn to improve drainage and break up compaction. Then follow a “sheet mulching” process which includes adding layers of organic matter on top of the cardboard with the top layer being compost soil. You can plant immediately although it’s better to wait until the materials have decomposed. I like to build sheet mulch beds in the fall or very early spring, then plant in late spring.
#4: Can tilling improve clay soil?
In many cases, tilling can contribute to more compaction. However, as long as the soil is moist (but not waterlogged), a one-time tilling can be a decent aerator, after which, the other suggestions in this article will likely produce better long-term results (less compaction, lighter and richer soil, fewer weeds). It’s important to add organic matter at the same time to get the best results.
#5: What are some soil amendments I can add to clay soil to improve soil structure and drainage?
Compost, green manure, leaf mold, livestock manures, and worm castings can all help improve clay soil.
What are your favorite ways to improve clay soil?
READ NEXT:
- 7 Ways to Improve Soil Quality
- Clay Busting Plants That Fight Compaction
- Get Them What They’ll Love: Gift Guide for Permaculture Gardeners
>>> Get my free 19-page Guide to Organic Soil Amendments for more ideas:


Luis says
Hi,
Would the addition of earthworms help in aerating clay soil?
Thanks for all the information you provide.
Sincerely,
Luis
Amy says
Earthworms are part of the “micro-herds” of soil organisms that help to improve clay soil over time. Personally, I would not add imported earthworms to your soil. If they aren’t present, then it may be because the soil environment isn’t hospitable enough for them yet. Rather, by adding organic matter and following these other steps, you create a habitat that should naturally attract worms that are native to your soil.
Cathy says
Yor thoughtfulness and cate about soil is such a relief to see! Thank you all of this high quality information on an important topic!
Tony Griffin says
I dug a root cellar and had 20 yards of caliche as a result of this dig. Using huglekulture as a means to improve this mess I now have four hugle beds in the process of becoming garden soil. Building soil from the bottom up takes a lot less time than building soil from the top down.
Amy says
Great idea to build hugels. This is an excellent idea if you have woody debris on hand.
Valori says
Hi Amy! Thanks for all the info you give here.
I planted a dense cover of crimson and white clovers in my garden and now that I’m chopping it down, there are a lot of baby slugs and also in a lot of spots there are very strong above ground spreading of the plants that seem impossible to cut through to plant in. (I’m sorry I don’t really know how to describe that!) My best guess is that they are trying to hold the soil in place, which is probably good, but how am I going to plant in that? I’m transitioning to no-till – last year my neighbor (we share a garden) dug it all out and turned it over and we put a lot of compost on top and had a very productive season, I grew clovers, vetch and fava in that spot over the winter and am trying to build the soil up with limited financial resources. Because of Covid 19 I want to plant right away but I don’t have access to garden stores. I’m not sure what the best course of action is. If I had the resources, I’d do sheet mulching over this, but cardboard and newspaper are out and getting more soil or compost to put on top is also out. Not wholly sure what to do. Any recommendations? I do have some straw (not enough for a thick cover). I have some leaves that were covering ground from winter that I can collect and put over. I’m guessing I need to cover them so that they will die and decompose, right? Or do you think those heavily rooted clovers should be pulled all the way out because it will be very hard to cut through to plant starts into? I don’t have a lot of space in my garden as is, and food scarcity is a real issue right now so I can’t afford to let it sit and work magic on its own for the year. Thanks for your advice! I hope that all makes sense.
Amy says
You’ve made some excellent decisions for building healthy soil. Unfortunately, many of the cover crops you mentioned are either perennials that come back every year, or annuals that are cold-hardy and often survive the winter. This isn’t a problem in gardens that are tilled, but in a no-till garden, your best bet is sheet mulching. Otherwise, you could try using a broadfork or digging fork to break up the plant matter. If you pull the clovers, definitely use them as a green mulch.
Christina Stephens says
Just a thought, but clovers are nitrogen fixers, so if your clover is thriving it may be that you are also low in N in your soil. Since cardboard and newspaper aren’t an option for you, you may consider wood chips (do not till them in) as a deep mulch. 1.5 to 2 feet deep of wood chips will kill the clover and help it decompose. For free wood chip mulch, look for the electric company truck taking down tree limbs. They normally will be very happy to dump their wood chip load for you. Some arborists will do the same, but usually, they are smart enough to sell the mulch they make instead of dumping it at the landfill as electric companies do. This doesn’t work for everyone, so I recommend you research how chips do in your area.
TAMMY SHODA says
I HAVE HAD THE SAME GARDEN FOR 20 YEARS. THE PAST 5 YEARS IT HAS NOT GROWN OR PRODUCED. IT IS ALL CLAY AND HAVE NEVER HAD WATER PROBLEMS. THERE IS A CROP FIELD 4′ FROM THE GARDEN. DO YOU THINK OVERSPRAY FROM CROP FIELD COULD CAUSE PROBLEMS?
Amy says
If the crop field is sprayed, then that would certainly affect your garden.
Lauren says
Hi Amy, thanks so much for all the info in your site! Question about leaf mulching- do you find it’s much more beneficial to shred your leaves, or do they work just as well whole? I’m not sure if I should invest in a little mulcher for leaves and twigs; do you find it to be worth the extra steps?
Amy says
Shredded leaves tend to break down faster from mulch to rich soil, increasing soil health. They also tend to allow rainwater and air to better reach the soil. Non-shredded leaves tend to form an almost impenetrable mat for a time until they start to compost down.
On the flip side, non-shredded leaves host many overwintering native and beneficial insects, so it’s important to leave some leaves non-shredded. I allow those that have naturally fallen in my perennial landscaping areas to remain in place, un-shredded.
However, if I gain access to leaf bags that I’ve collected from neighbors, then I like to shred those to make mulch and to compost it into a rich soil amendment. A mulcher is nice, but I think a lawn mower is almost just as effective. I like our mulcher, but it tends to clog easily.
John Hack says
I personnaly like “alfalfa Pellets or cubes” the carbon to nitrogen is optimal as compared to straw or wood chips, i put a 3-6 inch layer down and cover with tree chips, in less that a year we have earth worms and mushrooms, and no salts from what manure brings and the other nasty stuff fed cattle etc.
I am lucky I have a pellet plant close by, but they are reatively cheap in a feed store, some pet stores also carry them.
We are in the arid part of Arizona, and no native organics, the use of the pellets has changed quite a few wanna be gardeners here to having success, also the 1st ingredient in most compost staters is “Alfalfa meal'” and the pellets or cubes (use whichever is more economical) , as for clay I till in “decomposed granite” as a source of minerals and assist drainage, I get it at a aggregate supply place, my biggest issue is drainage, and root rots, so I build hills so to speak, I find the work worth it, done once and done for ever.
Amy says
For those with alkaline soil, I recommend caution with this strategy, especially alfalfa in concentrated forms like pellets/cubes/meal, as it can make soil even more alkaline. If soil leans toward the acidic, then great. If root rot is an issue, then tilling has likely moved the hardpan layer to just below your efforts. The steps in this article can help.
Victor says
Would laying a thick layer of leaf mold on top of soil that is clay help the soil over time to improve. Will I have to till it in to see any improvement in the affected area.
Joshua Awome says
Hi Amy,
I came across your website today and have read a lot of the articles and appreciate your advice. I am a young father working full-time and trying to learn as much as I can now to be self-sufficient and I am keen to find other gardeners who have advice to share that can make a difference to my daily life, so thank you!
I have three questions I would really like to ask.
1: Is it too late to add organic matter, leaves, manure etc to my garden? I live in Sweden, and right now we have snow on the ground still but according to the forecast it will melt before the weekend is over.
I live next to a big forest, so there are plenty of leaves lying around to collect, and there are some shetland ponies living very close to me that I could potentially collect manure from. I am, however, unsure if its too late and if there is another method I should turn to to give life and love to my soil?
2. If I was to embrace the no dig method on ‘a normal’ grass patch, would I then just first put mulch down on the grass, as you mention, cardboard and then put new soil on top of that and sow the seeds directly into that?
3. Is sea weed a good addition to the soil? The sea isn’t either far from me and there is an abundance of seaweed and I have heard that it is an excellent addition to garden soil?
Thank you for your time.
Joshua
Verner says
Sea weeds are an excellent addition, of not only nitrogen, but over 60 micronutrients. You can’t use it directly in the garden though, because of salt. You have to first let the rain wash it over winter. Put it on the terrace, and turn it over a couple of times during the winter as rain washes away the salt. A nice side effect is that the salt kills the weeds between the tiles.
David W Elliott says
I’m getting started with backyard gardening in the PNW, and I’m done some of these. In addition to the lasagna method, I’m planting comfrey and perennial sunflowers for their deep roots, to take it all deeper. What do you think?
Amy says
Comfrey and perennial sunflowers are well adapted to clay soil, but it depends on your goal. If your aim is to improve soil in order to plant crops, then I would select annual cover crops for temporary cover. See my article about clay busting plants for more ideas.
Mike Arrowood says
We just planted our garden because cold nights (below 45 degrees) are past till fall, we hope. My friend gave us a pickup truck load of fresh grass clippings and we mulched our whole garden with it. It covered the garden well. By the way, the clippings had no type of chemical spray applied during growth. May I ask your opinion using grass clipping for mulch during summer garden growth, then tilling it back into the soil for building up richer soil for next years garden?
Amanda says
Tilling is really bad for soil although aerating with a fork is good as it does not destroy the animal life and bacteria which help to prevent desertification. I wish you would voice sustainable tasks and recommendations. The USDA really does not want anyone to till to help prevent another dust bowl. They counsel farmers on no tilling and have resources with information.
Amy says
Hi Amanda! Have you checked out the site Tenth Acre Farm? They’re a big proponent of no-till gardening and have loads of information about it, including an article about transitioning to a no-till garden. Search the site for more no-till info! 🙂
Of course, as I mention in the article above, “a ONE-TIME tilling can be a decent aerator.” Tools are only bad when they’re used inappropriately. Tilling as a long-term strategy is a bad idea. Additionally, the USDA is targeting large-scale agricultural operations with their information, not backyard growers. To see how I address the issue of desertification for home-scale growers, see my article about preventing soil erosion.
Aug says
Gypsum ??
Amy says
Gypsum can aid in improving the permeability of clay soil, but it will have limited impact if other steps in this article aren’t taken to improve soil structure, drainage, and organic content. However, gypsum would be a wonderful addition to the above listed steps.
Desmond Walsh says
hello, very useful information . 1 have heavy claysoil with some sub soil brought to surface by house builders .
I’ve experimented by adding some agricultural gypsum , grit / agricultural sand , bought-in peat compost ( but giving up using that now) and a little home-made compost .This has improved the soil a lot . Not able to get farmyard manure but have mad a heap of shredded weeds and autumn leaves . How do I speed the decomposition of the weeds and leaves ? Should I add layers of top soil to it ?
My soil is devoid of earthworms but I have plenty in my home-made compost . Should I dig in the compose or just add clumps of it to encourage more earthworms ?
Lots of work to improve the soil but I do not mind !
Any advice gratefully received.
Des Walsh
Cliff says
Clay burning is a technique used successfully in England, you can google all that. First remove the top soil to expose the clay profile then build a fire and keep adding fuel as it ashes. Then douse. Clay burning breaks it up and makes it porous though needs some manual labour to achieve. You are left with a more friable depth, ash and biochar. Then rebuild your organic layers on top and plant. It is important to reintroduce microbes by way of good compost, liquid teas or innoculated media. Look into buying some trichoderma innoculant- or make your own from forest soil and mashed potatoes. Recipes can be found on patent application sites online. If none of this suits you then at least start using biochar. The microscopic pores become a well for nutrient storage and host for beneficial fungi to colonise plant roots.
Brendan says
Hi Amy,
I live in Jimboomba in Sunny Queensland Australia,
I have a HIGH PH (8.5-9 in places) heavy clay compacted soil. I have tried everything but it just doesn’t work.
Your steps are amazing for garden beds etc. but my issue is my lawn which is entirely dead because it simply cannot root down into the soil.
When it rains it takes DAYS or WEEKS to dry up and in the end the ‘mud’ ends up slightly green.
I tried completely tilling up half my lawn and left the other half just using gypsum on the other half. Neither works at all in assisting the soil structure.
What do you suggest to try and ‘heal’ my soil – I am 14 months of trying without any success?
Should I focus on the PH, Compaction or soil structure first? (Or is their something that does all 3)?
What shouldn’t I do?
How exactly do you ‘incorporate’ organic material into the lawn? Everywhere says adding organic material or compost – but a lawn is a large space and nobody says ‘how’ to do this and what to consider as ‘organic’ material.
Being the first day of winter tomorrow we are coming into the colder months (lowest potential -5’c and as high as 30’c) which will stick around from around mid June to mid August.
I eagerly and excitedly await your advice, recommendation and response.
Kind Regards,
Brendan
Eagerly await your reply.
Anna Lawler says
You have described my yard…clay and the bonus filled in swimming pool filled with concrete chunks♡.
I’m in coastal south Texas. What region are you in? Seeking someone in the area to learn more on permaculture with my same climate conditions.
Anna
Pottery Barn Up in Here says
We have lots of worms and lots of leaves, but it just sat atop a mess of wet, thick, dense, clay that does not drain. I think leaves that are moldy, full of fungus can HARM nearby trees by infecting them with mold and fungus, and THEY DON’T WORK. I’m gonna remove the leaves, use gypsum, and call it a day, like daddy did. I will be adding winter rye and using the clay breaer vegetables and herbs you mentioned in another blog. It’s a mess here. Lol. Anyone like to make pottery? Cuz I have lots of clay.
Amy says
If you bypass any of the steps I’ve outlined above, especially #1 and #2, you will likely continue to have a problem. You’re correct in that laying organic matter on top of clay soil is not likely to solve the problem by itself. And be sure to mulch appropriately for the season/climate at hand.
Suzanne says
I inherited an abandoned house that had a heavy clay garden bed that had been cultivated about 20 years before. The first year I planted potatoes and that really seemed to do the trick, it broke up the soil and by the end of the season I could turn over the entire garden with a fork.
Sunny Saejear says
Hello, first off I love your articles.
I live in southern part of Ohio. We do have rich thick heavy clay soil. I want to start a garden in my front lawn cause edible lawn makes me sense than a green lawn for me. I have already shoveled grass lawn which I have found lots of earthworms, so I feel bad tilling the soil that’s how I came across your articles( after reading TONS, out there but yours makes the most sense)
I want to be able to grow vegetables this season but I also want to do no till method. So here are my questions
Can I just fork the soil and add compost and grown my vegetables or will you recommend till the soil “one time” and add compost?
Or is there any other way will you suggest doing so I can improve the soil and grow vegetables right away?
Thank you
Amy says
It sounds like you’re asking how to create a garden where there is currently lawn. Your first step is to get rid of the grass. You can do this by renting a sod cutter. Remove the sod, and then you need to aerate the clay. A one-time tilling is not a terrible idea. You shouldn’t have to till again, as long as you add compost at the time of tilling and follow the suggestions in this article to continue to improve the soil quality.
Or, instead of a sod cutter, you can top the lawn with cardboard, which smothers the lawn over the course of a year. Follow a “sheet mulching” process… adding layers of organic matter on top of the cardboard. You will need several years of following the suggestions in this article to create good soil, but it can be done. I’ve built many of my SW Ohio beds this way. Tilling is faster.
Marla Bateson says
Living in the Pheonix area, my soil is clay. The surface is hard and no shovel is going to go into it unless it is wet. I’ve been here 30 some years. I now have garden areas that I can dig into with my hands. I read all the methods people have done to loosen the soil. I did not do any of them.
All the leaves that fell from MY trees, all the table scrapes and science projects that grew in my refrigerator went into a hole in the grow spots to be. Several times I dug out the area and backfilled with all the plant life I had. Watered as I went and covered it back up. Having three boys I did not have a lot of time to garden. I do not put my kitchen waste in the trash bin. Smells for one thing, I just dig a hole, throw it in and cover it up.
Peter Lee says
I live in Potchefstroom South Africa I live on a clay belt. What was soil 3 years ago to which I added this disappeared – nothing left. I now prepare raised beds. Twigs, leaves, topsoil and then compost. One of my beds now has a shadecloth base. It is working well with seed germinating excellently. I will repeat the process each year.
Thea says
Hi Amy, this article has already been a huge help, but I’d really appreciate any extra help on if your clay soil is weedy and grassy (and I’d love to put in nice Aussie native shrubs and plants!). Would the sod cutter plus the steps you’ve outlined be sufficient? Or extra steps? Would love not to use chemical weed killers if at all possible!
Thanks!
Amy says
There is no need for chemical herbicide when preparing a new bed over existing grassy or herbaceous vegetation. A sod cutter is fine, but the soil organisms live in the root zone of that sod. So if you remove it, you are removing any progress (and life) that nature had attracted on its own to improve the situation. Instead, you can cut the sod, aerate the subsoil, turn the sod upside down and replace it, then add 6 inches or more of compost soil on top to create a planting medium. Or you can leave the sod, aerate it, cover it with cardboard, then add compost and plant. After that, you would follow the steps in this article to grow a cover crop or living mulch, plant, and mulch, etc.