
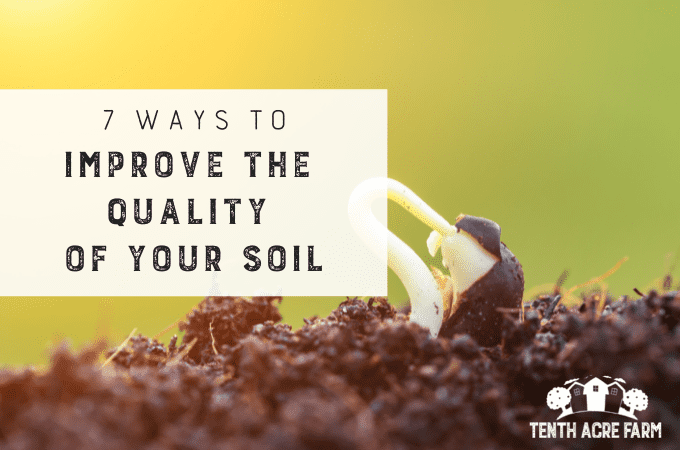
Good quality soil is essential for a healthy and abundant garden. Here are seven ways to transform ailing, lifeless soil into rich, black gold.
This page may contain affiliate links. Please read my disclosure for more info.
Does your garden consist of lifeless or hardpan soil?
While there are many ways to improve soil quality for the purpose of growing food, in this article I’ll share the methods that have been the most successful for me. Believe me, I’ve tried a lot of things!
When my first house was built in the 1950s, the developers scraped the topsoil from the yard, sowing grass directly into hard clay. Later (before I lived there), a second owner filled in the in-ground swimming pool with fill dirt (which, by definition, contains zero organic matter).
I discovered this when I started digging in the backyard to start my gardens, finding giant chunks of blue-painted concrete mixed with lifeless dirt.
It became my mission to transform my yard into a rich, abundant garden. I figured if I could do it, then others could do it too!
Improving Soil Tilth
Tilth refers to the physical condition of soil—how suitable it is for planting crops. Healthy soil with good tilth includes lots of organic matter. It is well-aerated and well-drained, yet retains enough moisture to feel like a wrung-out sponge.
To revive lifeless soil, aim to improve its tilth.
7 Ways to Improve Soil Quality
The following are the ways in which I improved my lifeless soil with the most success.
1: Create Permanent Garden Beds and Pathways
One rule that I learned early in my garden training is to never walk in garden beds. Stepping on garden soil compacts it, which destroys tilth as well as beneficial soil organisms and their habitat.
Establish permanent beds and walkways so that the beds are clearly defined.
Keep them narrow enough that you can reach all areas without stepping inside to keep foot traffic out. Beds created in this way can improve each year rather than starting each season in a compacted state from last year’s walkways.
In addition to keeping soil in the garden beds loose, permanent beds also save time and money.
Rather than applying costly amendments over a broad area, you need only apply them to permanent bed areas, skipping the pathways. Irrigation installation is easier, too, since the beds are permanent fixtures.
Permanent pathways of white clover, microclover, or wood chips attract beneficial insects and fertilize the garden.
Would you like to grow more food with less effort? Check out my mini guide, The Permaculture Inspired Vegetable Garden.
2: Choose NOT To Till
Tilling is a mechanical method for quickly loosening and aerating soil in preparation for planting.
Although it may be useful on large farms where managing soil by hand would be impractical, a tiller is simply a quick fix in small gardens and on micro-farms, where it can have detrimental effects on soil in the long run.
In some instances, tilling can encourage the soil to blow away in the wind or wash away in the rain. Read about How to Prevent Soil Erosion in your garden. It can also destroy beneficial soil organisms.
Fortunately, growing crops on a small backyard scale doesn’t require tilling to produce loose soil for planting.
A digging fork or a broadfork are useful tools in the no-till garden because they loosen the soil without destroying microorganisms. A digging fork gently aerates and loosens the top few inches of soil before planting.
Get more tips in my article Transitioning to a No-Till Garden.
3: Create a New Garden with Sheet Mulching
Sheet mulching is a no-till method for starting a new garden or reigning in a garden that’s been overtaken by weeds. It consists of smothering existing vegetation with a layer of cardboard, and topping it with a rich planting medium.
Decomposing cardboard and plant residue attracts worms and other soil organisms to jumpstart a healthy soil ecology. Meanwhile a rich planting medium on top provides ideal conditions for crops and habitat for soil organisms.
The planting medium can be a nice layer of homemade or store-bought compost soil. Or it can be various “sheets” (layers) of raw organic materials like food scraps, grass clippings, straw, and shredded leaves that eventually break down into compost soil.
Allow sheet-mulched areas to sit for at least two weeks before planting, and ideally for three months, to allow it to decompose into a rich planting medium.
Beware of Herbicides (even if you don’t spray)
Unfortunately, herbicide contamination has become common in the organic materials added to compost bins, even in gardens that aren’t sprayed, which causes stunted growth in crops and lackluster performance.
In fact, manure is also often contaminated. And herbicides have even contaminated store-bought compost soil that is approved for Organic agriculture!
Take some time to learn about this issue to keep your garden herbicide-free.

Here, I’m sheet mulching an area of lawn by adding a layer of horse manure over cardboard.

After applying horse manure and shredded leaves, I topped this new circle garden with a layer of compost soil for planting, and a wood-chip pathway.
4: Add Organic Matter
We often start out with soil that is not ideal for growing food. But we’re anxious to get growing, so we go ahead anyway. Now we’re asking our soil to produce nutrient-dense food from nutrient-deficient soil. This can lead to lackluster harvests or pest and disease problems.
Amending soil in the fall is important even if you start with great soil, simply because of the nutrients you’ve harvested from it throughout the season.
You see, there is reciprocity between you and the soil in organic gardening; a give and take. Fall and winter is a great time to replenish soil and let it rest if necessary.
Add organic matter in the fall to start every spring garden on a good note.
Read more:
- Building a Compost Bin (5 Ways)
- How to Improve Clay Soil
- Worm Compost (make your own or buy worm castings)

Food scraps transformed into rich worm castings.
Would you like to learn more about improving the health of your soil, reducing maintenance, and increasing yield?
You’ll find loads of information just like this in my award-winning book, The Suburban Micro-Farm.

5: Mulch for Big Benefits
Mulching encourages healthy soil tilth by retaining moisture and nutrients. It also saves time by reducing the need for weeding, watering, and fertilizing.
How you mulch your garden beds depends on your climate.
For example, heavier mulches are beneficial in hot, dry climates where moisture evaporation is high. In contrast, lighter mulches are more appropriate in cool, rainy climates where soil benefits from the warmth of the sun, but still needs protection against erosion.
For most gardeners, a heavy mulch in the off season provides protection beneficial soil organisms against the elements and reduces soil erosion from heavy rains.
After a pest outbreak, however, discard affected plant material and do not apply mulch over the winter so as not to provide protection to overwintering pests.
There are many ways to mulch and many types of materials to use. Learn more in my article Mulching in the Permaculture Garden.

Grass clippings topped with shredded leaves makes a balanced mulch that reduces weeds and retains moisture.
6: Plant Cover Crops
Cover crops are an excellent addition to your soil improvement program. They can provide organic matter and nutrients, improve drainage and aeration, attract beneficial soil organisms, and act as an overwintering mulch.
While cover crops can be grown in rotation with other crops at any time throughout the year, they are most popularly sown in the late summer or early fall to grow over the winter.
Many are killed by the winter cold to make spring planting easy, while others are turned under before planting. Use a digging fork (or chickens!) to turn cover crops under about three weeks before planting in the spring.
Here are some cover crops that have worked well for me:
*I always add cover crop seeds to my gift wish list (I can never have enough)! See what else is on my gift guide for permaculture gardeners! 🙂
Read more about cover crops:
- Here are some clay-busting plants that fight compaction.
- Choosing the Best Cover Crops for your Organic No-Till Vegetable System
- Cover Crops: Feeding the Soil that Feeds Me
- Homegrown Humus: Cover Crops in a No-till Garden
7: Grow Chop-and-Drop Nutrient Accumulators
Nutrient accumulators are plant species that are often integrated into permaculture gardens. The roots of ‘accumulators’ are said to collect specific nutrients from the soil.
These potentially nutrient-rich plants can be chopped back several times throughout the year in order to use the cuttings as a mulch. This may save money by reducing the number of soil amendments you need to purchase. Growing them may also improve biodiversity.
Although there hasn’t been a lot of research conducted on nutrient accumulators, comfrey is the most often-cited plant. This study suggests using comfrey as an organic, DIY fertilizer spray. Learn more about using comfrey to fertilize your garden.
Here are some herbaceous plants to ‘chop and drop’:
- Comfrey: Learn how to grow comfrey or buy comfrey root for planting
- Weeds: Learn 5 weeds you want in your garden
- Yarrow: Learn 5 reasons to grow yarrow or buy yarrow seeds

Flowering comfrey attracts beneficial insects and provides nutrient-rich mulch.
There are many ways to improve soil quality, but at the heart of each method is the goal of reducing compaction, amending soil with organic matter, and taking advantage of the off-season.
What methods have you used to improve your garden soil?
READ NEXT:
- 4 Berry Bushes that Fertilize, Too!
- Comfrey Fertilizer: Does it Really Improve Soil?
- How to Source Herbicide-Free Compost Soil
>>> Get my free 19-page Guide to Organic Soil Amendments for more ideas:


carolin martens says
I had watched Back to Edan for the first time this year, and added a ton of cow manure, mulch expecting to see a huge improvement but not so lucky. Not that I do not think his method is correct, I think I just have to play around with the dirt a bit more, adding more compost. The Japanese beetles were horrible again this year, attacking plants they had not bothered with the year before. Rain was to much for some plants, but I know it is a learning process so I continue to educate myself. Thanks for the information, working on it again this fall.
Amy says
It is so discouraging when our hard work doesn’t yield the results we hoped for. Don’t give up — another year of adding lots of organic matter and your garden soil should be more stabilized 🙂
cindy says
We had terrible Japanese beetles and we put out milky spore . It took a year to do something because it destroys the larva. After that we had hardly had any Japanese beetles.
Haha, we stopped putting out Japanese beetle traps because they attract Japanese beetles.
We dug up our yellow roses because the Japanese beetles LOVE yellow.
Karen says
You make pretty keyhole gardens. 🙂 Would you have any suggestions on how to lower soil ph organically? Mines a whopping 7.34. I have chickens and a wood burning fireplace. Must have gone a little overboard with the manure and ash as amendments. It was a death sentence to my poor blueberry plants.
Amy says
Blood meal, bone meal, worm compost, coffee grounds, and leaf mold (leaves composted for 3-5 years) are all known to help lower and/or stabilize pH.
Chris says
Specific rock dust can also help swing pH to the direction you would like it (neutral for most plants).
“Gypsum and limestone are two different forms of calcium, a basic and important plant nutrient. Gypsum is calcium sulfate, and tends to acidify soils, which is helpful in dry regions, where most soils start out as alkaline.
Limestone is calcium carbonate, and it tents to make soils more basic, which is useful in humid regions, where leaching tends to keep soils somewhat acidic. The material can be laid down on the solid at the time of the initial bed preparation, but it should also be added regularly in small amounts to the soil surface with mulch.”
— The Forest Garden Greenhouse by Jerome Ostentowski at the Central Rocky Mountain Permaculture Institute in Basalt, Colorado. (I am in no way associated with this institute. I have just found all of the information in his book useful and he believes in open source information.) http://crmpi.org/media/videos/
Amy says
I love JO’s work, so thanks for mentioning it. Keep in mind that rock dust is not immediately bioavailable in the soil. Beneficial soil organisms will break them down into a bioavailable form that can affect soil pH. For this reason, compost and other amendments that boost soil organisms should be spread at the same time as the rock dust. This will also minimize the amount of rock dust you need to apply, saving you money in the long run.
Anna Lear says
Ash actually increases soil pH – I live in New Mexico (with very alkaline soil & water) and don’t use it in my garden because it’s like poison here! I do use coffee grounds as well as pine needles, pine cones, leaves, compost, and manure; I also add gypsum, sulfur, and epsom salts (magnesium sulfate) to provide more nutrients because with the high pH water (mine tested on year at 8.2!!) plants have a hard time taking up available minerals. It has taken me about four years to make decent soil, and it has been worth it!
Peg Cook says
I have been an Agronomist, Master Gardener and Crop Consultant for nearly 40 years. In order to LOWVER pH relatively quickly, I would recommend applying pure Elemental Sulfur. It is available from Garden Centers and often Farm Stores and can be quite expensive. But, you only need a small amount. Still if you have land that tends to be alkaline (7.0+), a 50 lb. bag may be more cost efficient to buy. When applying the Sulfur, be sure to wear a dusk mask because it can burn your lungs.
Another thing is that Sulfur is a natural fungicide that can be used around plants. For example, when planting potatoes in a garden which requires a pH of 5.5, I recommend sprinkling 2 tablespoons of Sulfur in the hold. Then, cover it over with a LITTLE soil and place the tuber in the hole and cover. This way the Sulfur acts as an acidifier as well as a fungicide preventing a great deal of scab and scurf.
If you know your pH and the area of your garden, email me and I can give you a Sulfur Recommendation for Broadcasting.
Brandy says
We have a 38′ x 78′ main garden that needs some amendments to improve the soil (the upper garden which is slightly smaller is still too weedy for amendments quite yet), and we hope to turn some more land into a garden of equal size next year. I was wondering if you knew if these methods worked on such a large scale, or have suggestions for gardens of that scale? (Note: We use crop rotation and a rot-o-tiller in the garden due to its large size. We plan to add some composted chicken manure to the garden next year as well.) Thanks!
Amy says
Adding lots of organic matter will do wonders, regardless of the size of the garden, as will adding herb borders that attract beneficial insects.
Patty says
How to improve my soil? When we moved to ‘rock hill’, I just gave up the first year or two growing in the ground and started my new garden in tubs and buckets. As those gardens produced I was working in starting new beds and building them up as organic materials became available as we worked the new territory. 🙂 Clearing brush allowed for some big hugelkulture beds that are now starting to produce in years 3 & 4 here. Clearing some overgrowth and raising the canopy gave us sunlight – that lil’ essential most plants needs. Tada!!!! Clearing some of the brush allowed us to pile it in hedgerows that prevent erosion and give wildlife a place to live. We are following that old saw “Inch by inch life’s a cinch, yard by yard, life is hard.” We are eating this elephant one bite at a time, one season at a time, one project at a time. Each year has seen us adding new beds. Not having a bunch of money to throw at the problem all at once we grow incrementally. Fruit tree layer first, then we had a shrub planting year, then a perennial plant year, etc.
Amy says
I love this! It is so important to develop a homestead incrementally, and this is an important consideration in permaculture design. When you develop it incrementally, you get to discover the feedback that the land gives you, which in turn guides your next small development. The feedback gives you clues and ideas that may change the way you had intended on building that next component. In the end, an incrementally developed space will be more resilient than one that was developed all at once.
Patty says
Yes. As I’ve learned more, I’ve had to move some things around to the chagrin of my sons/helpers, but that other old gardening saw, “1st year sleep, 2nd year creep, 3rd year leep!” is turning out to be true. Taking the time to learn why something did or did not work has helped too in going forward.
But, ohhh, the poor plants who had to die so that I might be educated! 🙁
Amy says
I’ve never heard that garden saying, but it is so true!
Patty says
Leap, not leep! Ha, one of these days I’ll learn to spell. Thought of another way I’ve built my soil. My entire yard is 98% rock. I live on top of a hill that had experienced a ton of top soil loss before I got here. In order to build it back up task #1 was to first stop the erosion w/check logs and 2nd is I’ve become an expert TRASH PICKER. I pick trash wherever I go. Cardboard, toilet paper rolls, boxes, newspaper, shreds, etc. All have become fodder for building the topsoil back up. I guess this comes under your sheet layering and mulch topics, but I tuck it in anemic existing beds in fall, cover over w/leaves, etc. See some rocks poking thru? Add a flattened toilet paper roll or papertowel roll I’ve lifted from Mom’s trash can or newspaper from the Sr. Citizen center, cover w/leaves. Next year a bit more of soil.
Rain gulch running thru the dirt driveway? Peat moss on top. Yeah, I’m the crazy lady who is out in the rain putting out peat moss and throwing down white & crimson clover seeds and topping w/grass clippings and old leaves in the middle of a thunder storm. If you aren’t out in the weather you can’t observe what’s happening out there. My poor (rural) neighbors…I’m the one out there in my flannel nightie w/the velvet pants underneath (warm) and a rain slicker on and zebra striped rubber booties. Fashion be durned, I’m fighting erosion here peeps!!! Sometimes there is no time to get geared up in proper gardening fashion, one must strike while the thunder rolls! 🙂
Amy says
It certainly takes a lot of commitment to turn land into cultivable soil. It’s not for the faint of heart, which you are demonstrating quite clearly 🙂
Patty says
Meant to also add another old saying that applies to gardening/homesteading/permaculture as well…Learned this one from Coors. One of their company mottoes was “Waste is a resource out of place.” I believe it.
Amy says
I love it!
Sarah Torres says
Hi. Thank you for this article! I’m a beginner trying to get educated, and my question is about no-tilling. I’ve always used a garden fork to loosen and turn over the soil. I thought that was a form of tilling? What is no-tilling with a garden fork? I’m wanting to amend and build the soil for a year before I plant next spring,so I think I need to add compost, cover crops,etc. Thanks for your help.
Sarah
Sarah Torres says
Wanted to add that the area I wanted to plant in is covered by grass, so I had planned to till that under with the garden fork.
Sarah
Amy says
I love that you’re thinking of building a bed this year for planting next year. That’s really the best way to go about it 🙂
I would call what I do with the digging fork “loosening” the soil, not “tilling”. But it’s all in the technique used. If I use my digging fork like a shovel and turn over the soil, then that would be like tilling. On the other hand, if I use the tool to poke holes in the soil to aerate and loosen the top few inches for planting or amending, then that creates a different result.
You can certainly use your digging fork like a shovel and turn the sod over to make a new garden bed. Although I’ve done it that way, it was a lot of work, and I had a lot of grass grow back. Depending on how big your proposed garden area is, you might think about sheet mulching or doing a first pass with the tiller to get started.
Judy Kern says
we are just starting no-til, in the north our growing season is from may to october if lucky.. our garden is very sandy and is 40 years old, it is in need of some tender care,,,, should we start our no-til in the fall or spring, I how do you keep slugs from taking over the garden, we will be sheet mulching with cardboard, straw, leaves, grass clippings,
Amy says
I prefer starting a no-till garden in the fall. That way the sheet mulching can compost and settle down to be ready for a spring planting. Spring is fine, too, either way, the first year is always a bit iffy as the soil contents and soil organisms get settled. In the spring, be sure you are planting directly in soil, rather than in mulch materials. In your climate, a lighter layer of mulch during the wet seasons will improve aeration and reduce pests. Keep mulch materials away from plant stems to cut back on slug damage. Of course, there are lots of other slug repellent ideas out there, too. Good luck 🙂
Eugene says
Amy, I have followed you for a few years and I have never seen anyone comment or request what to do about termites. Any info you can supply would be helpful. Thank you and keep up the good work that you do which you do very professionally. I visit many sites.
Amy says
Hi there. There is a discussion about termites that you might find helpful in the comment section of my article Here’s a Quick Way to Terrace a Hill.
jolj says
I double dug my beds the first year & till in organic matter every year, some times every season. I do not lose soil, because I mulch.
I have not had a problem in 30 years, with my soil, but I have no earthworms, because the moist soil is too hot for the worms in full sun & less than 4 inches of mulch. I till old mulch under every year & have more vegetable then we can eat & put up. No till is go for lazy yuppies, but some of us enjoy the process of gardening.
Stacie says
I live in Coastal South Florida, zone 9/10 border. Is permaculture possible with our sandy soil, both heavy rains and drought climates with bug munching 24/7/365? I don’t want to fight a more uphill battle than I’m already fighting to have an organic garden but LOVE the idea of growing everything we need and want naturally and the gardens are so pretty.
Amy says
Permaculture is a design science, so it’s possible anywhere! Its purpose is to work with nature, so give it a try, and maybe you won’t have to battle bugs year round. 🙂
Ess says
I grew a garden patch on a sand dune – no soil to start. Put 3 times the compost and added as much material as I could find. If you can get it – try using biochar. That stuff is like a veggie turbo booster. In a modest 4×8 bed I nearly double veggie production in the 2nd years.
Scott Straley says
This article has proven to be a fantastic resource for me. Its core principles run parallel to everything I’ve discovered over the years, and in one area of my gardens or another, I’ve used all the methods it outlines that I wasn’t already using.
Cheers for sharing your wealth of knowledge.